Wallpaper

web shop - We offer a wide range of high-quality

wallpaper

and luxury wallpaper
MENÜ
Home page arrow Advice for wallcovering
Advice for wallcovering
MrPerswall Wallpaper hanging guide

Dear Customer!

Prior to wallpapering:Begin by familiarising yourself with the wallpaper. Cut the lengths at the markings and lay them out in the right direction and check that the pattern matches and that there are no edge variations. If you discover a problem, stop wallpapering immediately and contact your dealer.Adhesive:Use adhesive for non-woven wallpaper.


Your needed tools:

 Image Image  Image  Image 

A plumb line (e.g. a pair of scissors hanging from string) for checking that the wallpaper lengths hang straight
Pencil
Roller Brush for areas where the roller cannot be used
Image  Image   Image Image 
Tray Container of clean water Soft sponge/clothNB! Do not rub the wallpaper. Instead, use more water Papering tool
 Image  Image    
Steel rule/spatula (for support when trimming the wallpaper at ceiling and floor le Wallpaper knife


Start wallpapering:


 Image Image 
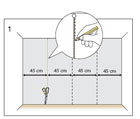
1. Align the first length using a spirit level or plumb line (string + a pair of scissors). If you prefer, mark guidelines on the surface for more precise wallpapering.
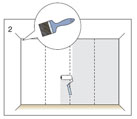
2. Apply sufficient adhesive to the wall to cover a width of 2-3 lengths (90-135 cm). It is important that the entire surface be covered with adhesive without leaving any bare patches, as these cause blisters beneath the wallpaper. Make sure there is a thin, even layer of adhesive over the entire surface. Use a brush for areas that are hard to reach with the roller. Be sure to check that the length adheres to the surface.
 
Image  Image 
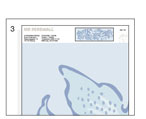
 3. Follow the instructions at the top and bottom of the length. (Check which is up and which is down)
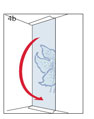
4. When moving the wallpaper to the wall, fold the length together in the middle with the pattern inwards in order to avoid getting adhesive on the front of the wallpaper.
Image  Image 
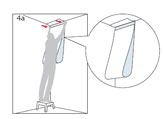
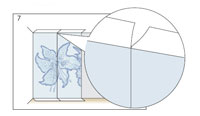
5. Attach the top of the length to the wall at the preferred height and in the correct position before letting go of the rest.  6. Align the top and bottom of the first length before “smoothing down” the wallpaper. Never try to reposition a length of wallpaper. If you make a mistake, remove the length and start over. Apply more adhesive if the first coat has dried.
 Image Image 
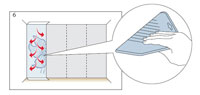
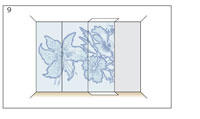
7. Use the papering tool to smooth out the wallpaper and remove any excess adhesive and air bubbles. Keep the papering tool clean! Always wipe the papering tool clean to remove any adhesive residue or ink transfer. Using the papering tool, work from the ceiling to the floor and from the middle to the edges.  8. Then continue with the next length, matching up the edges. Ensure that the lengths are properly positioned and that there is no surface visible at the joints. It is important that adhesive be applied right out to the edges to ensure the lengths adhere to the wall properly.
 Image   Image
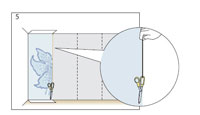
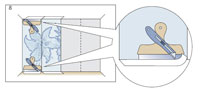
8. Cut away anything that is not actually wallpaper (instructions, white edges). Preferably use a steel rule or spatula for support when trimming the wallpaper. Replace the blade often, as a dull blade can easily tear the wallpaper.  10.  Continue in this manner until the wall is finished.


Questions & Answers:

Wipe away adhesive!

If you get adhesive on the front of the wallpaper, wipe it off immediately with a damp sponge. Do not rub at the wallpaper; instead, use more water. If the sponge is dry, it can act as an abrasive.


The wallpaper is patchy!

Newly-hung wallpaper may appear blistered and spotted, but this should disappear after 24 hours or so.


Air the room!

Remember never to shut up a room of newly-hung wallpaper, but leave to air and maintain a normal room temperature to ensure the wallpaper dries properly. The room and wall should be kept at a minimum of +18 °C.


Raised edges, blistering and gaps?

These common problems are not due to the wallpaper, but rather to the amount of adhesive used, the surface and the method of wallpapering. Damaged materials are replaced with a defect-free version on production of an order. Mr Perswall is not responsible for painting and rewallpapering costs or costs associated with loss of time or any other indirect damage.


Wallpapering over plasterboard or chipboard?

Apply a preliminary layer of adhesive or undercoat to very absorbent surfaces. Otherwise, the surface will absorb water from the adhesive.


Wallpapering over woven glass or other painted fabrics?

Must be filled and sanded. Apply a preliminary layer of adhesive.


A contrasting background!

Use an undercoat if there is a noticeable difference in colour to the surface, such as filled joints in a dark surface or wallpaper with a bold pattern.


Even and smooth surface!

Remove the surface layer of seagrass, vinyl, textile or structured wallpapers before rewallpapering.


Wallpapering over a painted surface?

The surface should be washed with a degreasing agent or similar and rinsed with water, particularly if gloss paint has been used.


Product support information:
Hajlék-2000 Kft
College to contact: Ilona Nagy Mészarosné
Tel.: +36 30 9 798 234
Mobile: +36 30 9 798 234
E-mail: This email address is being protected from spam bots, you need Javascript enabled to view it This email address is being protected from spam bots, you need Javascript enabled to view it
www.tapetawebaruhaz.hu.

Wallpaper shops

1. Wallpaper Centrum

1081 Budapest, Szilágyi u. 1/a.


Open:


Monday - Friday: 09-18 h
Saturday: 09-13 h

Phone: +36-1-303-90-52
Handy: +36 30 9 798 234
Fax: +36-1-785-03-20
E-mail: This email address is being protected from spam bots, you need Javascript enabled to view it
www.tapetacentrum.hu


2. Wallpaper Center
     

1047 Budapest,Perényi Zsigmond u. 47.

Open:

Monday - Friday: 09-18 h
Saturday: 09-13 h 
Phone: +36 30 9 798 234
Handy: +36 30 9 798 234
Fax: +36 1 231 0273
E-mail: This email address is being protected from spam bots, you need Javascript enabled to view it
www.tapetacenter.hu


3. Wallpaper Market - Wallpaper webshop

1089 Budapest, Delej u. 43. 

Open:


Monday - Friday: 09-18 h
Saturday: 09-13 h
Phone: +36 30 9 798 234
Handy: +36 30 9 798 234
Fax: +36-1-323-00-13
e-mail: This email address is being protected from spam bots, you need Javascript enabled to view it
www.tapetawebaruhaz.hu
www.tapetauzlet.hu
Take it Easy! Wallpapering with EasyUp


EasyUp is a durable, non-woven wallpaper that produces smooth walls without visible seams. When you choose EasyUp, you get an extremely hardwearing wallpaper that is dimensionally stable and easy to hang. And the next time you paper over EasyUp, there won't be any sanding or filling to do.
Wallpapering with EasyUp
  • 1. Clean the floor so the wallpaper doesn't become dirty when you unroll it.
  • 2. We suggest you start wallpapering next to a window or door.
  • 3. Use a plumb line to ensure that the first length is vertically straight.
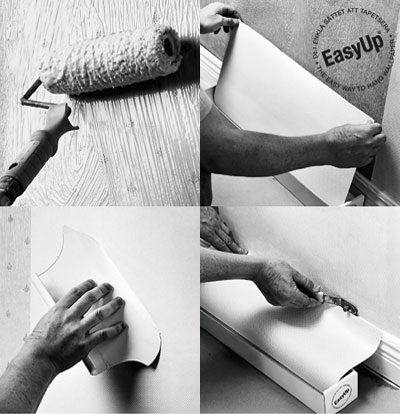
  • 4. Roll the paste onto the wall to cover the width of 2-3 wallpaper lengths (1-1.5 metres). Use a brush along edges and skirting boards.
  • 5. Put the wallpaper tray on the floor. Pull up a length and attach it at the cornice, allowing it to overlap the cornice by a couple of centimetres. Cut off level with the skirting board. (If you aren't using a tray, hold the roll at the ceiling and unroll it down the wall.)
  • 6. Smooth out the wallpaper from the middle towards the edges using a wallpaper smoother – work carefully along the edges taking care not to get paste from the wall on the smoother.
  • 7. Hang the next length edge-to-edge with the previous length.
  • 8. Smooth this length, just as you did with the previous one. Work from the middle and across the edge, making sure the edges of the two lengths are tightly butted together.
  • 9. If paste oozes to the front of the paper, wipe it off immediately with a damp sponge.
  • 10. When papering around windows and doors, cut the lengths roughly to size, allowing extra for trimming.
NB! EasyUp wallpaper is made of a non-woven material that allows moisture to penetrate through it. Any damp patches that appear when you hang the wallpaper will disappear once it has dried (usually within 24 hours). Ensure good ventilation during application and drying.
Outside corners
  • 1. Using a knife or scissors, cut off a length from the roll leaving a margin at the top and bottom. Remember to allow for pattern alignment.
  • 2. Measure the distance from the edge of the "last" length to the corner. Add about 20 mm and cut the cut-off length to that width. Apply paste and then hang the length around the corner.
  • 3. You are now going to use the rest of the cut-off length to overlap the one that you just hung on the wall by about 10-15 mm. Using a brush, apply paste to the front of the first length.
  • 4. Hang the length about 5 mm in. Otherwise it may tear if you hang it right into the corner. Wipe away any excess paste with a damp sponge.
Inside corners
  • 1. Measure the distance from the last length of paper on the wall to the corner. Add about 10 mm and use scissors or a knife to cut the next length of paper to that width. Apply paste to the wall and to the next wall by slightly more than one width of paper. Hang the wallpaper that you have cut.
  • 2. Using a brush, apply paste to the front of the paper from the corner. Now hang the length of wallpaper that you cut off right up into the corner, making sure to hang it straight. Wipe away any excess paste with a damp sponge.


Image 

Tools/shopping list


 Make sure you have the right tools at home so you can get on with the job without getting all glued up!


  • - paintbrush and roller
  • - wallpaper smoother and tray (EasyUp)
  • - wallpaper brush (paper wallpaper)
  • - plumb line, e.g. scissors and string
  • - folding rule
  • - sharp scissors
  • - bucket, sponge, water
  • - wallpaper knife
  • - ruler
  • - cutting ruler and block
  • - protective paper for the floor
  • - wallpaper paste
  • - pasting table

  • - paintbrush and roller
  • - wallpaper smoother and tray (EasyUp)
  • - wallpaper brush (paper wallpaper)
  • - plumb line, e.g. scissors and string
  • - folding rule
  • - sharp scissors
  • - bucket, sponge, water
  • - wallpaper knife
  • - ruler
  • - cutting ruler and block
  • - protective paper for the floor
  • - wallpaper paste
  • - pasting table


  • - paintbrush and roller
  • - wallpaper smoother and tray (EasyUp)
  • - wallpaper brush (paper wallpaper)
  • - plumb line, e.g. scissors and string
  • - folding rule
  • - sharp scissors
  • - bucket, sponge, water
  • - wallpaper knife
  • - ruler
  • - cutting ruler and block
  • - protective paper for the floor
  • - wallpaper paste
  • - pasting table


  Image

Language of symbols


Understanding the symbols used on wallpaper and paste.
 

Image 
Resistant to light 
 Image
Excellent resistance to light 
 Image
Pattern height 
 Image
Straight alignment 
 Image
Offset alignment
Image 
No alignment
Image 
Pattern alignment required
Image 
Washable  
 Image
Extra washable 
 Image
Scrubbable
 Image
Wet strippable
  Image
Impact resistant
Image 
Paste onto the wall
Image 
Four-length roll 
 Image
Swedish Wallpaper Council 
 Image
With PVAc for improved strength 
 Image
Textile adhesive, machine adapted
Image 
Textile adhesive with < 20% dry matter content
Image 
Textile adhesive with > 20% dry matter content 
 Image
Non-woven adhesive 
 Image
Mark of Quality Assurance from the International Wallcovering Manufacturers Association (IGI)
 Image
After dabbling, upper layer is removed easily


<< Start < Prev 1 2 3 4 Next > End >>

Results 28 - 36 of 36